Tables
- 1. Select Table Block under Text section.
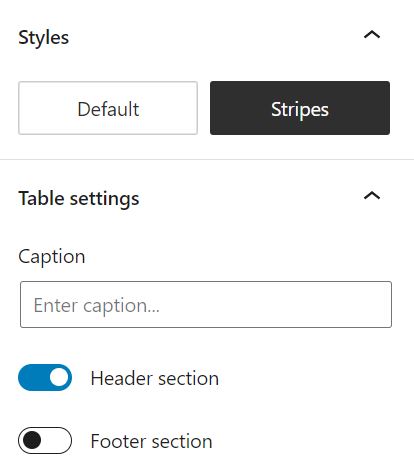
- 2. Select number of rows and columns. Under the Gear icon, select table style from Default or Stripes.
Table Format Functions

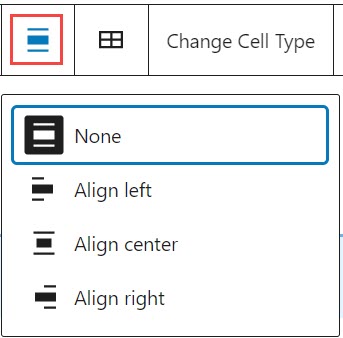
Alignment Options
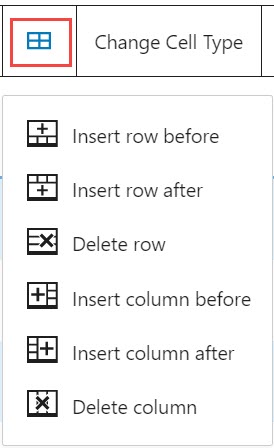
Edit Table
Change Cell Type
This feature boldens and centers text in the graph

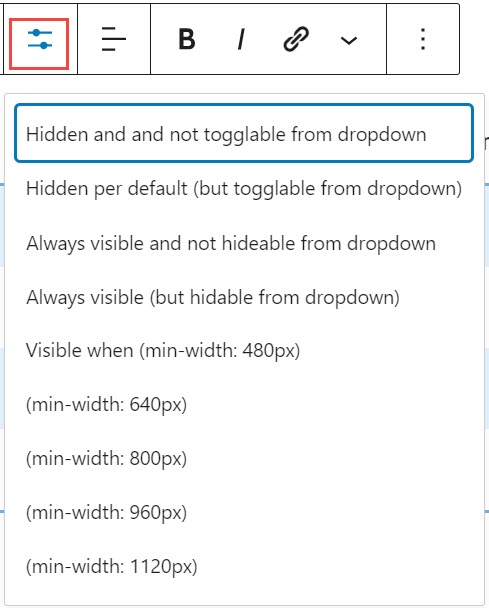
Set Priority
- 1. Select Complex Table Block under Add new Block feature.
- 2. Select Gear icon and choose table style from Default or Stripes.
- 3. Select Complex Table Block and use table formatting functions to change table alignment style.
Examples
Stripes Style, Default Table Alignment
| Title One | Title Two | Title Three | Title Four |
|---|---|---|---|
| Data 1 | Data 2 | Data 3 | Data 4 |
| Data 1 | Data 2 | Data 3 | Data 4 |
| Data 1 | Data 2 | Data 3 | Data 4 |
| Data 1 | Data 2 | Data 3 | Data 4 |
Default Style, Left Table Alignment
| Title One | Title Two | Title Three | Title Four |
|---|---|---|---|
| Data 1 | Data 2 | Data 3 | Data 4 |
| Data 1 | Data 2 | Data 3 | Data 4 |
| Data 1 | Data 2 | Data 3 | Data 4 |
| Data 1 | Data 2 | Data 3 | Data 4 |
- 1. Select Pseudo Table Block under Add new Block feature.
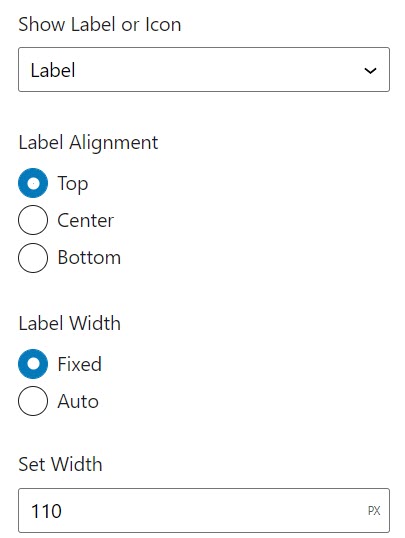
- 2. Select Gear icon and select Label or Icon. Label displays text content and Icon displays agent Icon.
- 3. Label Alignment and Width gives padding to the features.
Examples
Pseudo Table with Label
RBC
Contact your RBC Financial Advisor
Find an AdvisorPseudo Table with Icon
Contact your RBC Financial Advisor
Find an Advisor- 1. Select Responsive Table Block under Add new Block feature.
- 2. Select Gear icon and and choose table style from Default or Stripes.
- 3. Under Gear icon, change table settings to access first column sticky feature.
- 4. Select Responsive Table Block and use table formatting functions to change table alignment style.
Examples
Default Style, Footer section
| Title One | Title Two | Title Three | Title Four |
|---|---|---|---|
| Data 1 | Data 2 | Data 3 | Data 4 |
| Data 1 | Data 2 | Data 3 | Data 4 |
| Data 1 | Data 2 | Data 3 | Data 4 |
| Data 1 | Data 2 | Data 3 | Data 4 |
| Data 1 | Data 2 | Data 3 | Data 4 |
| Footer 1 | Footer 2 | Footer 3 | Footer 4 |
Stripes Style, First Column Sticky
| Title One | Title Two | Title Three | Title Four |
|---|---|---|---|
| Data 1 | Data 2 | Data 3 | Data 4 |
| Data 1 | Data 2 | Data 3 | Data 4 |
| Data 1 | Data 2 | Data 3 | Data 4 |
| Data 1 | Data 2 | Data 3 | Data 4 |
| Data 1 | Data 2 | Data 3 | Data 4 |
- 1. Select Stackable Table Block under Add new Block feature.
- 2. Select Gear icon and and choose table style from Default or Stripes.
- 3. Under Gear icon, change table settings to access first column sticky feature.
- 4. Select Stackable Table Block and use table formatting functions to change table alignment style.
| Sticky First Column | |||
| Data 1 | Data 2 | Data 3 | Data 4 |
| Data 1 | Data 2 | Data 3 | Data 4 |
| Data 1 | Data 2 | Data 3 | Data 4 |
| Data 1 | Data 2 | Data 3 | Data 4 |